Showing posts with label Project Life. Show all posts

Sunday, March 24, 2013

project life - february

This year I intend to link up with Nightwolf's Den for my Project Life posts.  I'm aware is it's now three weeks into March and I haven't posted any of my February layouts yet.

Time to fix that. Here are some of the February pages and a couple of pages from January to give you an idea of how I'm approaching Project Life this year.

Firstly, I'm not using any of the core kits, so I'm using my own supplies. This involves a lot of Kraft cardstock, craft tapes (like Washi, Cavallini & Co and Tim Holtz), papers from my stash and digital supplies. 

I'm making my own journalling cards and backgrounds for the photos and also journalling directly onto the photos. I'm doing it mostly digitially (mostly onto 6x4 canvasses), then printing the whatever I have ready to print once a week at my local photo processor.

So here are some of the results.

Double layout plus A4 journal insert from our camping trip and the Zoe saga


Close up of folded journal card on page 2 of the above layout

Journalling inside the folded card

February first page

February page - including wine label on Kraft 6x4 card

One of Juniordwarf's February pages

I'm also putting in quotes & thoughts I notice during the month

6x6 hybrid in a Design E page protector (from the Bushy Park show post)
 
That's how things are going at the moment. I've tried to stick with one basic colour for most of the layouts each month - February was a sort of pinky-red - to make the pages match up a little bit, but I'm not sticking rigidly to that if I see something that matches the photos or the theme for a particular layout.

I haven't done any photos or layouts for March yet. I hardly had any photos for the month and then all of a sudden everything started happening and I've been overwhelmed with photos. So there's a lot of sorting and editing to be done before my next post.

Sunday, March 3, 2013

february catch up

 Item number 19 on my 100 things to do in 2013: Blog at least three times a week.

Number of posts in February: five.

That doesn’t quite add up, does it?

I’ve started writing several posts and either never finished them, or decided I didn’t want to publish them after all. Or I’ve thought, why would anyone want to read that, and given up.
Not really what I had in mind when I wrote the list and decided I wanted to blog more often.
Now it’s the start of a new month.  It’s time to review the past month and (possibly) get inspired to blog again.

So what’s happened?

Project Life
I’m pretty much up to date with this and just have a few more photos to print for February, and then I should have a few layouts to share. I also managed to finish not one, but two layouts in the “in progress” album. Progress indeed.

Food
These are the posts I’ve been struggling with. I really don’t know what to write without looking like I’m trying to justify myself or defend what I’m doing. 

That looks so stupid now that I've written it down. I don’t have to justify making healthy changes to my life. Quitting sugar is the way I decided to start. There are a lot of opinions about whether sugar is really so bad. I don’t know the answer to this one. 

Anyway, the quit sugar thing has really turned into quitting a lot of the processed food with added sugar, which is what I’ve been trying to do (see Item 1 on the list). So I haven’t followed the Quit Sugar program completely. I’m still eating small amounts of fruit (which the program says to cut out, and reintroduce later on when you’ve broken the sugar addiction if you want to).

Apart from that I’ve been sugar-free, other than a couple of meals that other people have cooked that have had an ingredient that contains sugar, for six weeks now. I’ve politely refused desserts, have been into coffee shops and ignored the cakes and haven’t so much as even looked at the 85% chocolate in my fridge. (It’s there for me to test whether having not eaten sugar for an extended time changes the taste of that type of chocolate – whether it actually will taste sweet to me.) And I haven’t really felt like I’m missing out or depriving myself.

One thing I’ve noticed is that my coffee has started to taste quite sweet now from the lactose in the milk. I’ve never had sugar in coffee, so this is quite a strange sensation. 

I’m happy with how things are going at the moment, and I’m continuing to read about food and trying (most of the time) to make the best choices for me. 

Exercise
As soon as I read that exercise can make you fat I gave up exercise.

Well not really, since to give up something, you actually have to be doing it first.

Ha.

But seriously, I have been doing some form of exercise most days, even if it’s just walking to work. At the start of the year my goal was to be walking 15,000 steps a day and to get back into yoga. It’s still my intention to do both of those things.

I bought a yoga DVD a couple of weeks ago and have been getting up earlier most mornings to do one of the routines. Juniordwarf has been joining me, which is fun. 

Next Month
I do want to blog more often. At least, more than five times in the month.

Related: does anyone have any regular link-ups that they participate in that are fun? I did Wordless Wednesday once and then promptly forgot about it . . . 

Sunday, February 10, 2013

where has the week gone?

A week has gone by without me posting a single post. So much for blogging three times a week.

I started a post about how Week 2 without sugar went, but then it got long-winded and started to get into arguments with myself about what I was doing. So all I'll say is the experiment is continuing and if I get through today, I'll have been three weeks without sugary treats or (as far as I can control) added sugar in anything.

Juniordwarf returned to school. It wasn't the big emotional event it was for me in 2011 and last year. In fact the holidays flew by so quickly, the return to school almost caught me by surprise. I didn't really have time to think about it, or even do anything to mark it. I took a couple of photos of Juniordwarf in his classroom and that was about it.

I did some work on my Project Life album. 

As a temporary fix, I moved my November and December 2012 pages that were overflowing from last year's album into a new album, where I've also set up my 2013 pages.

I'm still debating whether to keep doing Project Life in the hybrid way I did it last year, putting the physical photos into an album as I do them, or whether to load everything into a digital photo book and print it once. The main obstacle to doing that is deciding what to do with all the chunky memorabilia that's difficult to scan. It would also mean that I didn't have a physical book until next year some time.

So what are this year's pages looking like? 

I'm glad you asked. 

This year I'm not using any of the core kits. I'm using various digital papers to create background cards for the photos, journal cards and title cards. 

I'm sticking to two fonts - one for titles and the other for journalling - and will mainly be journalling in black or white text. I'm also going to try journalling directly onto my photos, so that I can free up the journal card slots for more photos.

I did that a bit last year, but I plan to do it a lot more this year as I think it looks great. I was inspired by some of the lovely pages from Windy Willow, who is creating some gorgeous spreads. 

So this is what one of my pages might look like when I print out the photos and slot them into the page protectors. It's basically six 6x4 pictures, with the middle row able to be cut into the 2.9x4 size that slots into the smaller pockets. (Yes, I forgot about the slightly smaller width for those "cards" when I was putting this together, so the gaps aren't very even. But this is just a mock-up to show the general idea.)


Because I'm doing a monthly approach, rather than weekly spreads, I don't have title cards for pages where the photos are just random things that happened. Only the spreads where all the photos are of the same subject will have their own title card.

As you can see, some of the 6x4 "cards" have journalling and photos, and some are just photos. I have a 3x4 picture on one 3x4 "card" and the rest of them are devoted to journalling. (I had quite a lot of journalling on this page.)

So that's how it's looking at the moment. I'll be able to see what I think of it when I've printed the photos and put them in the album. 

I've kept it simple, with no embellishments at this stage because I know if I started looking for the "perfect" embellishments I'd take forever, and never get these photos done. And getting them done is my main objective. So the "added extras" aren't being added. I might look into this a bit later in the year if I get time.

This year I'll be linking up with Nightwolf's Den for my Project Life posts, so I'm looking forward to seeing a lot of inspiration over there.

Now it's on to February.


Thursday, January 24, 2013

project life 2012 - the home stretch

I really wanted to get the rest of the 2012 photos edited and printed for my Project Life album by the end of January, so I kept going with it this week. Since my last post I have:

Finished the October 3x4 journal cards.


Printed some more title and 'month in review' cards.


Edited and printed all the remaining 2012 photos.


Started thinking about my 2013 album.

 
And realised that this album is not going to be big enough to hold the whole year's photos.

(This is up to August.)

So I've got too much for one album, but not enough for two.

While I'm dealing with that problem, I also have piles of photos from the last four months and a whole week off work to gradually sort them out and put them into page protectors.

And then I can get started on the journalling. And the January 2013 photos.

I wonder if Photo-free February could become a thing?

Tuesday, January 15, 2013

sorting photos

After an epic photo editing weekend, I had over 150 photos to print on Monday morning for my August and September Project Life layouts. (I might add here that September was a huge photo month, with Juniordwarf's birthday, his party and our holiday to the East Coast, so there were a lot of photos to go through. I think I did well to cut them back as much as I did!)


I'm really not good at culling photos or picking one or two to capture an event. So where other people might be doing weekly layouts and choosing the best photo (or two) to put in their album, I end up with an entire page.

Case in point:


I love these Design C page protectors because I can just slot in six 6x4 pictures (or in this case, five and a title card), no cutting or resizing required. Not even any journalling, although I could have replaced one of the pictures with a 6x4 journal card. What I might do is tack a card to the back of one of the pictures, do the journalling and put a tab on the top so that it can easily be pulled out.

(I hear some of my scrapbooking friends laughing hysterically as I mention journalling.)

I also find it very difficult to reduce the number of photos I take (thereby increasing the sorting task) because, even though I already have heaps of photos of a particular thing (Juniordwarf asleep comes to mind), there is always a slightly different angle, a new expression, something that catches my eye that I just have to have a photo of . . . and so I do.

I'm trying to cut back, but I've always been a prolific taker of photos, and once I got a digital camera, there really were no limits. The challenge for me is to try and take fewer photos, but better photos, and to let go of the ones that don't contribute to the story.

I suspect this will take a while to achieve.

Sunday, January 13, 2013

getting organised

While I'm still trying to catch up on my 2012 Project Life album, I've been gradually formulating a plan for my 2013 album.

It's going to involve some blank grid cards, some left over stuff from my 2011 Turquiose Kit, possibly the digital version of that kit, and this lovely selection of products, mostly by Tim Holtz.


I actually bought the paper for my One Little Word project.

Yes, I know, the idea for OLW is to use stuff you already have in your stash and not to run out and buy heaps of new products. But as I was looking through my stash, the look that appealed to me for OLW was the sepia-toned, old-fashioned stationery, twine, brass, clocks, keys kind of feel* . . . and I realised I wanted to carry that through to my 2013 Project Life album as well.

I knew that what I had wasn't going to be enough for a full year, and that the paper collection I really loved had sold out very quickly in our local scrap shop. And I already had several of the Tim Holtz pins and brands and other bits and pieces, so it wasn't that hard to justify buying just a few more little bits and pieces (and I didn't have to buy them anyway, thanks to my birthday gift voucher that I was wondering how to spend).

Win-win.

So where am I at?

Project Life: I've finished editing the August photos and I've almost finished getting the September photos ready for printing. Just the hybrid 3x4 photos for the month overview to go. (The most time consuming of the lot.)

One Little Word: I've decided on my word. I can't decide whether to use an 8.5 x 11 album as Ali suggests, or go with my idea of an A4 art journal. In the mean time I've cut out the 18 cards for the January project. Yes, that is actual progress.

And just for something different, this is my set up for my diary/staying organised system for 2013. If there's anything that contrasts more with the vintage stationery look, I'd like to see it.


This is my Masterplan Diary, Lamy rollerball pen (thanks to Santa aka my Mum), Delfonics ball point pen (thanks to the lovely people at Notemaker who gave me the pen as part of their pen amnesty in 2011) and a Rhodia No.13 pad for taking notes during the day (thanks also to Santa aka my sisters in law).

With this system, I'm trying to integrate my daily planning and record-keeping with the photos I take, so that putting together my album won't be too difficult, and won't require too much searching through my stuff to find out exactly why I took that photo three months after the event. Also I intend to keep up to date, so that I don't have to go back months to find out why I took that photo.

Next step: reduce the number of photos I take ;-)


* I put the some of the blame for this on the new vintage stationery and letterpress store that recently opened in our town. It's made me want to get out the typewriter (which is still in storage) or even hand write some letters on beautiful paper. I refer you to number 21 on my list of 100 things to do in 2013. But first things first, let's get this digi scrapbooking under control . . .


Wednesday, January 2, 2013

organising project life

In my last post I said that I was several months behind in my Project Life album for 2012. I tried to keep up, but once I got a little bit behind it became easier and easier not to do anything, and the photos built up and up.

If I was less of a perfectionist, I'd probably say something like, "stuff it, I'm just going to grab a few of the most memorable photos from each month and make a couple of spreads for each month and be done with it in a day or two".

Alas, I am not that person. I feel like my album is half full with the style I went with at the start of the year (note I never got around to posting Part 2 of that post . . .) so it would look weird to suddenly do a truncated version for the rest of the year.

So I've made a start at sorting, organising and editing the rest of my photos from July to December.

It's become a four-stage process.

I met a fellow Aussie Project Lifer, @Kelmscott_Girl, on Twitter a few days ago, and her post on catching up had some great ideas about keeping your photos under control.  I also recently discovered that I can create folders in iPhoto (on my Mac), which has made the sorting process a lot easier. (Yeah, I know, I've been using Macs most of my life and I didn't know about folders . . . )

So, on to what I've been doing.

Stage 1 is simply sorting out which photos I might want to use. I create a smart album in iPhoto for all the photos I took in the month. Then I made a copy of that album as a normal album, so I can delete the photos as I transfer them into their subject album (this is probably not necessary, but you can't delete photos out of a smart album and I like to be able to see which photos I've allocated and which ones I haven't used).

I create standard albums for each month:
  • Little photos (for the Design F summary page - like the card below)
  • Random photos (with one or two photos per event)
  • Photos of the boy doing random stuff (same)
Then I create individual albums for events or things that will have one or two pages devoted to them.

I make a folder for the month and put all these albums in it to keep the side bar tidy and so I don't get lost.


Stage 2 is to decide which photos I will actually use, and which page protector design will work with them. Here is where I'll work out the structure of the month, because the design I choose for one set of photos will, to some degree, determine which photos I can use on the next page. For example, I can't follow a right hand Design A page (the 6x4 landscapes) with a page of portrait-oriented photos on the left on the next spread.

I write this all down with basic page designs so I know where to put the photos when I get them printed. Then I export the photos into equivalent folders into my Project Life folder ready to edit.

Stage 3 is editing in Photoshop Elements. This could be simply tweaking the levels or cropping and resizing, or it could be creating photo montages, or making hybrid journal cards like this one (from the Little Photos album).


A word about the hybrid journal cards. They seemed like a great idea when I started doing them, but they take more time than I thought they would. I'm not totally sure whether it's any easier than cutting out the photo and hand writing the card. But I kind of committed to the style this year, so I want to stick with it to the end. It also means I have A LOT of my Project Life kit left because I've done so much work with the digital kit.

The final stage is to print the photos and put them into the physical album, filling in any journalling cards that I haven't already done on the computer. This is where I tend to procrastinate, as I'm not good at journalling. I use a date stamper for the dates, as this came with the original Project Life kit in 2010, but I've decided to stop using it after this year. It's easier to hand write the dates.

After all that, as of today, I've got July ready for printing, I've sorted and organised August and September and I've culled October, November and half of December.

My approach isn't as simple as I'd like it to be, so I'm hoping to streamline it in 2013. Also I don't intend to get six months behind again, so I won't need to be doing six months at once!

Saturday, February 25, 2012

Project Life - January - Part 1

My 2012 Project Life album is coming together quite well. This year I've stuck with my approach of working month by month, rather than using the "Photo a Day" approach, or doing a spread for each week. These are popular ways to use Project Life, but they don't really work for me.

What I do is make several pages of random things that I've taken photos of throughout the month - so usually some pages of Juniordwarf doing his stuff, one or two 'random' pages and then layouts that cover an event or a place that we went to - either a double spread or singe page, depending on how many photos I took.

At the end of last year I started adding in different sized page protectors so I could include things that are bigger than photos in the album as well. Mostly these are A4 and A5 sheet protectors.

For the first page each month I'm using the new Design F page protectors to include some small photos of random things, places and events that I might not otherwise have included. Most of these are from my Instagram photos that I have resized to 2" x 2".

January title page (R)

Instead of using the physical journal cards, I purchased the digital collection from Jessica Sprague. I simply add the photo to the card in Photoshop Elements, include any of the extra elements that I want (usually just the day sticker), and type in my journalling. I wanted to use the same fonts that are used in the Cobalt collection, but couldn't find out what they are. The closest I found for plain text was American Typewriter, which I really like.

Once I'm happy with the psd files I open up a new 6x4 blank file, paste in two of the 3x4 journal cards and then print them as a normal 6x4 photo.

For each month's title card, I'm using one of the digital 6x4 cards and typing in the title and again printing it as a 6x4 photo.

The reverse of the title is one of the digital bi-fold journal cards that I've resized to 6x4 (the bifold cards are slightly narrower than 6" so they can fit into the 3x4 slots). I've then typed in the "month in review", included the digital numbers to represent the dates of the most significant things we did during the month and then hand-written some journalling about those events directly onto the photo.

Reverse of January title page (L)

Then for the rest of the month, I continue the same approach I used last year.

January page 3 (R)

Pages 3 and 4 are a combination of digital and paper. Page 3 includes a lot more journalling than photos. I wanted to include the baked beans recipe and the story behind cooking them. This was another one where I used one of the resized bifold journal cards and added pictures and journalling.

January page 4 (L)

I love the new page protector designs, as they provide a lot more flexibility in terms of the photo sizes and orientations that I can include. Design D, with four portrait 6x4 photos and four horizontal 3x4 journal spots is one I think I'll use a lot.

January page 5 (R)

January page 6 (L)

For the journalling in pages 5 and 6 I used the 3x4 cards and turned them sideways. There are a few designs that have the grid pattern rather than ruled lines, so can be used either way.

A4 and A5 page protectors between pages 6 and 7

January page 7 (R)

I'm also mixing up whether the photos have white borders or no borders because I think it breaks the pages up nicely.

Where I include more than one photo on a 6x4 picture, as in page 7 (above) sometimes I will break the photos up (bottom left) and sometimes I'll keep them all together (top right).

January page 8 (L)

January page 9 (R)

Page 9 is an example of Design B, which I like because I can use one 6x4 portrait and one 3x4 landscape photo plus a journalling card to tell the story. I used it quite a bit last year and I'm glad it's included again this year.

So that's it for Part 1 of January, and my new approach to Project Life. Part 2 will show some layouts that cover specific events, rather than random photos over the course of the month.

Do you use Project Life? What approach are you using? 

Friday, January 13, 2012

Project Life Pages December 2011

I've been trying to finish off my 2011 Project Life album, and have finally caught up to the end of the year. There are just a few little bits of journalling left to do, and about 12 actual scrapbook layouts that will slot in at the relevant months.

They're going to take a bit longer.

I'm not going to post all of the pages from December as there are a lot of them, but here are just a few.

These are my standard month title pages (using nine of my favourite pictures of the day - or photos that didn't need to be journalled about in any great detail - and Juniordwarf's Xmas photo because I forgot to leave a slot for it).


I started using the clear number stickers on some of the photos, so am going to go back over the previous months and do that with them too. Before this, I really hadn't used those stickers at all, so at least this way they get used up. Because they only go up to 10, I need to use two stickers for any date past the 10th, so the 1s and 2s are going to be used up a lot more quickly than the other numbers. That's why I'm not numbering all of the pictures.

The next layout is a double spread of Juniordwarf being arty - pictures of him making his wool picture, and then the picture itself (strategically done on a 12x12 piece of cardstock). Also some journalling and examples of how his drawing has improved this year.


And then a layout about our weekend at ours friends' place. I printed a title onto one of the photos and then printed it a bit smaller than normal, with a white border, and stuck it onto a 4x6 card I had cut from the cardstock that came with the kit (top left).


For the journalling, I used one of the bi-fold journal cards but didn't fold it (top right). I stuck a 4x3 photos on the card and journalled on the front and the back.

Next is a Farm Bar page, and this is an example of where I've printed several photos onto 4x6 canvasses.


Two Xmas layouts: First, lots of photos and then an A4 sheet protector with the letter that Santa left for Juniordwarf. On the other side of that is the wrapping paper Juniordwarf made to wrap his present to me that he made at school.


The final set is Juniodwarf and I spending an afternoon together. I put all the photos in the page protector and printed the journalling out onto an A5 sheet, which I included in an A5 sheet protector (both sides). In the other A5 sheet protector I included the brochure from the model railway and a postcard. On the other side of that, I put a brochure relating to the photos on the next page.


So that's it for December, and the 2011 album is almost complete. I just have to do the monthly overview photos (as explained midway through this post) and a couple more journalling spots I missed during the year, and then it's all done.

I'm pinning blog posts and photos that are inspiring me for my 2012 Project Life, so if you want to check out some wonderful albums, have a look on my Pinterest Project Life board.

Saturday, January 7, 2012

Week in review


So I’m not doing a photo and a post a day, but I still need to keep track of what’s been happening so that I can keep up to date with my 2012 Project Life album and don’t get five months behind like I did in 2011. The main point of me doing that project is so I can remember what all the photos I take are of, and why I took them.

Having said that, one thing I want to do this year is put the camera away sometimes. I think know there have been times when I’ve been so focused on taking the perfect photo of something that I’ve missed out on fully experiencing the moment at the time.

That seems a little ridiculous – if the moment is that fantastic it will live on in my memory without a photo (or at least without the perfect photo, and certainly without 10 or 20 photos), and what point is the photo if I didn’t really experience the event?*

So . . . I need to give myself permission to not capture everything and to not feel guilty about not doing it. I don’t need a picture of every little thing Juniordwarf does, I don’t need to record everything I do. I need to do it.

The photo a day concept is great, and it provides a time capsule of what my life was like over a relatively short time, which I think will be cool to look back on in years to come. But it is incredibly time consuming – even with the simple approach in Project Life – and I don’t want to spend my whole life catching up on recording things, rather than actually doing things.

One of my friends suggested a weekly approach, rather than a daily approach, might work well for this year.

I’m going to give that a go and just do one post with highlights of the week. That doesn’t mean I won’t post at other times during the week on other things, like Project Life or my struggle to beat my demons (because we all know that you love reading that stuff), but for the stuff that caught my eye during the week, I’m going to try and stick to one post.

So, here’s a selection of photos for the week:

(Monday) We went to Russell Falls.

This will make good topic for Sunday Selections on Sunday. (I think Kim is still running it. I haven't done one of those posts for a while.)

(Tuesday) Juniordwarf made a person out of his salad – cucumber slices for the body and head, carrot sticks for the arms, legs and ears, and lettuce for the hair. He then ate the person piece by piece, from the bottom up, and every time he picked up a piece, he said ‘looking at the person now!’

I lied. There isn’t a photo for this moment.

(Wednesday) I went back to work. I was dreading it because the previous two days had been really hot and I don’t own any hot weather work clothing. Fortunately a cool change came through and I didn’t need it. There was a stunning rainbow over the mountain on my first day back.


(Thursday) The bus got stuck in roadworks at Granton. This is the scene from the window.


(Thursday) Juniordwarf had been asking for a Harry Potter book for ages and he was really expecting to get one for Xmas. I suggested it might be better to get it from the library so he could see if he really wanted it before he went out and bought it. It arrived at the library and he was so excited about it he couldn't wait until Slabs came back to the car to start reading it. 

Slabs and I started reading it to him but he didn’t want to hear it. When I put him to bed he said he’d read the book to his teddy after I turned out the light. It seems like he tried to do exactly that.


(Thursday) Slabs and Juniordwarf picked me up from the bus stop and we went down to the Esplanade so they could go fishing and we could have dinner outside. It’s a shame the weather wasn’t particularly pleasant (what a change earlier in the week), but still it was a lovely thought from Slabs for us to do something a bit different, and it was a really nice way to spend the rest of the afternoon.


(Today) We went for a drive on a road we’ve never been on before.


* This the point where the camera addict acknowledges that her husband has said this to her on more than one occasion.

Thursday, January 5, 2012

Project Life Pages November 2011

I've spent the past few days trying to catch up with being several months behind with the journalling for my 2011 Project Life.

Last night I got to the end of November, so all I have to do is select the photos for December, print them, put them in the album and do the journalling. Oh, and finish all the scrapbooking layouts that I have planned to slot in throughout the album.

There's still a lot to do before I can even consider starting the 2012 album. I haven't decided on an approach for 2012, but I know it's going to be a lot simpler and more organised than 2011 was.

Here are the layouts for November 2011 that I finished last night. I've also started putting in different sized page protectors so I can include different things.

First up the two month summary pages, right and left (or front and back). These are where I put 10 of the 'photos of the day' that featured on my blog last year.


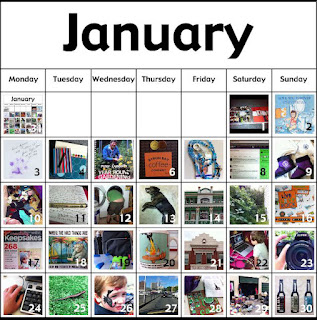
After these pages will come the one month calendar page, backed up with the month's "journal in a sentence" to explain the pictures. I haven't printed them yet, but each month will look like this:


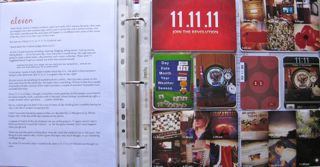
Then we move onto some event-specific layouts. First "eleven", where I have used an A4 sheet protector for my journal of the day. It was too much to fit on a single card. (The other side of the A4 will have one of Juniordwarf's artworks.)


Next is the story of Slabs and my weekend away in Oatlands, and I did the same thing with the A4 sheet protector for the story (front and back) and an A5 sheet protector for the tourist brochure.


A page about Juniordwarf's arty pursuits.


Then we moved into the random picture layouts about Juniordwarf. As you can see from the second page, I've been printing titles onto the 3x4 blank journal cards for the 'Design B' page protectors, as the 6x4 title cards don't fit.  (They could probably do with some more embellishments, but I don't have time. I just want to get the pages done!) In the third page, I cut up one of the 12x12 cardstock sheets to make some extra filler cards.


Then another themed layout. Here I put a certificate I received in an A4 sheet protector and printed out my blog entry for the day and put that in the other side of the sheet protector.


And the last page (left hand side) to round the month off is "just some stuff".


And that's it for November. It wasn't a huge month of photos, but we certainly did a lot. Apart from the lack of embellishment on the 3x4 title cards, I'm content with it.